
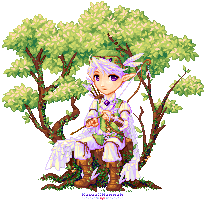
Elven Archer
I took several progress shots while I was working on the Elven Archer, so I hope this gives you an idea of how I’ve worked ^_^
Basic Sketch
Here is my initial sketch. I wanted an archer to be sitting on a tree stump, with branches and leaves coming out the back.
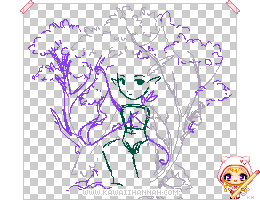 You can see the stick figure sketch of the base is done mostly in green, so I can see the sketch separate from the background.
Line Art and Base
I’ve cleaned up the image now and drawn the line art. I haven’t bothered to draw certain details yet, like the bow / arrow / clothes, because I want to create the base for others to use.

You can see that I’ve started adding shadows around the base head and behind the eyes.
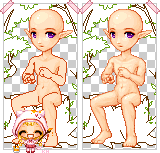 I’ve jumped forward now and shaded the eyes and face. I’ve also started adding definition around the body, the base of the throat and the archer’s left leg.
The second image I have finished off the shadows and lighting. I have also blended the outlines in, some of the inner lines have basically disappeared to become darker shadows on the body and I have used them to show small details like the toes and fingers.
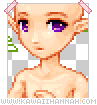 Here’s a closer picture of the face. You can see I’ve anti-aliased the eyebrows so they blend better, as well as around the top of the eyes and the mouth.
The eyes have been highlighted with peach rather than white.
Clothing and Hair
Base Clothes
 It’s a big jump here, but I didn’t take any more screenshots in between I’m sorry ^^;
I’ve begun adding clothes. I wanted something crossed between an elven prince and an archer.
He’s been given loose white pants, with matching sleeves, an arm guard for the bow and a tunic-vest.
Finished Clothes
 I’ve finished his clothes off for the most part now, adding boots with vine and feather details and various other accessories around.
The hat is only half done at this point and will be partially covered by the hair.
Hair
 You can see I’ve now flat-coloured the hair – I haven’t bothered with outlines, because I know how I want it shaped already.
I’ve also flat-coloured the cape and finished the hat, adding details and feathers to it (what good is a hat without feathers?) >>
I’ve only taken these two shots of the hair during colouring, but they should speak for themselves.
 I’ve added shadows in the hair clumps that I want to be underneath the other hair clumps.
The highlights have been used to show the bunches and loose strands of hair that stand out the most from rest.
Cape
Back to the clothes now. I’ve begun shading the cape. The idea behind it was to have a cape that was split up the back and made of feathers. I decided to lay the base shadows and lighting down before adding feather details.
 Alright, I’ve changed some of the shapes of the folds by adding more highlights in places.
In the second image, I’ve started adding feather details – basically they’re just the tips of the feathers showing. To show these, I’ve added shadows around where the outlines would be and in some cases, highlights as well so they look like they’re sticking out to catch the light.
 I’ve finished the cape for now.
This stage is basically the same as above, but the feather details have been finished off up the back of the cape. I’ve left the bottom of the cape without details, so the fabric shows through.
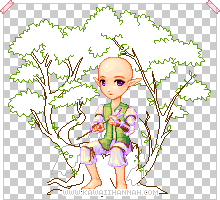
Tree Stump
Boredom set in for me at this point XD It often happens if you’ve been staring at something for a long period of time. Sometimes swapping between different areas of the artwork can help, or just take a break for a bit.
 Anyway, I’ve flat shaded the tree and because most of the top of the stump can’t be seen, I’ve added details there as well. I have also added the first layer of shadows on the trunk and branches.
 The trunk and branches are finished now. I’ve added the bark texture in the way I added feathers to the cloak. I’ve added shadows underneath his legs as well. The light is on the top left and he’s sitting on the log, so his legs will cast a shadow on the trunk.
The bunches of leaves at the top have started to be defined on the left of the tree. I’ve used the shadows to put some of the bunches at the back, while leaving others unshaded at the front.
Also you might not notice it, but I darkened the back of the cape XD I decided at this point that it was too light and didn’t stand far enough back.
 Another jump. The outlines of the tree have been darkened to accommodate the darker shadows that have been added.
I’ve highlighted several bunches of leaves as well as a few individual areas, using leaf-like shapes. Using highlights in certain shapes helps to give texture.
 This step is fairly simple, I’ve blended the outlines in.
The leaves directly growing on the stump stand out better now and I’ve added a few minor shadows in the leaves at the top.
 This step looks much more complicated than the last one, but I’ve only added one layer of highlights. Again, they’re drawn in the shape of leaves.
I have refined some other parts of the tree too, changing some areas to shadow, or darkening shadows further.
Finished the leaves on the tree now.
In the top left hand corner branch, you can see I’ve thought about adding moss and thrown some in there to see how it looks.
 Deciding I liked the moss, I added more. I’ve tried to keep the moss to the shadowed areas of the tree in this case, otherwise the tree becomes entirely green and stands out too much. On the flip side though, it makes the boots stand out better ^^
 You can see that the moss is darker in the shadows under the legs. I decided to add some blades of grass around the base of the tree too so it didn’t look like it was floating there and a couple of bits of fungi on the trunk.
The moss is finished now (right), the grass has been shaded and we’re just about done~
The Last Details
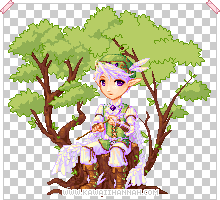
These are the last of the details I have drawn. The main parts I’ve added are the bow and quiver.
 I’ve also done a few last minute changes and put a few darker shadows in places around parts of the moss, and shaded the fungi, which I had forgotten about ^^;
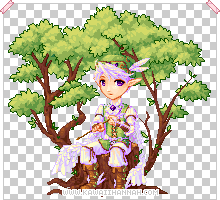
And that’s all ^_^
 I did actually animate this piece, but I’ve only touched lightly on it below.
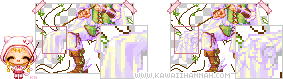
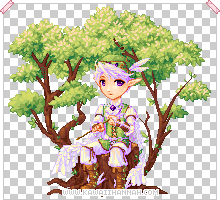
Otherwise, here are the steps above, in animated form!
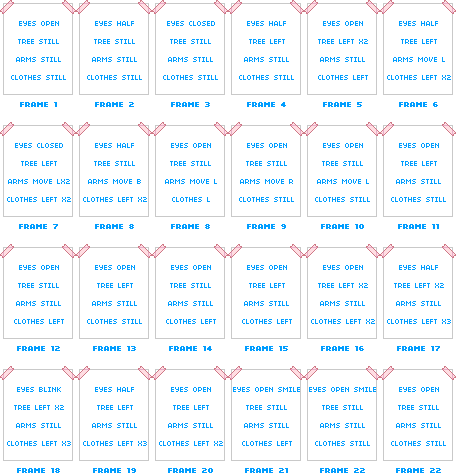
The Animation
Animation Plan
Alright, so I already know what I want animated at this point – I had the whole time drawing to think about it XP
 So, I want him to move his arms slightly, fitting the feathers into the arrow and smile slightly. While this happens, the wind will be blowing the leaves and his clothes.
This is the plan XD Because there are several things all happening at once, I am going to use the delay of 200ms.
The reason for this is that 2x100ms = 200ms, so if I need something for only half a frame, I’ll make it two 100ms frames (for example, I want the “Eyes Half” only there for 100ms, the other 100ms they will be either closed or open).
I know I’ll have to have more frames than I’ve specified above, but those will be the key frames of movement.
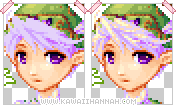
Blinking
 I started by animating the blinking first. It has the frames with the different frame delays, so it’s easier to get that done and fit everything else around it.
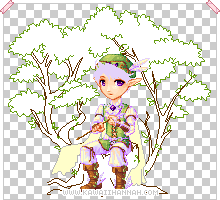
Arm Movement and Smirk
 Alright, now we’ve got the arms moving and the smile. To make the arms move, I’ve simply moved them 1px in different directions and consequently, had to move the arrow as well.
Simple movements such as this don’t require much in the way of redrawing and can be a nice addition to an animation.
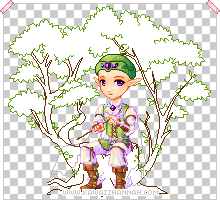
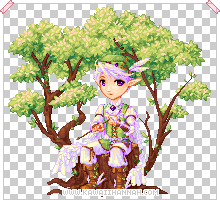
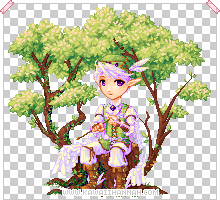
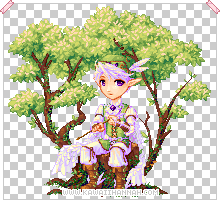
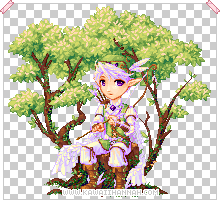
Windblown Animation
 Here we go, this is the final animation. All that’s been added from the last step is the wind blowing.
For windblown clothing / hair etc, you can usually simulate wind by moving one side of the item 1px in the way the wind is blowing. I did this with the leaves in the trees and then re-shaded small parts so it fitted better.
I’ve also stepped the windblown animation – the clothes follow the wind the same time as the leaves, whereas the feathered cape returns to it’s position slightly afterwards. I’ve found it makes the windblown animation look less clear cut and more natural looking.
Having several things moving at once can be difficult to get your head around, so it might be a good idea to start with something basic. Try drawing a doll, make it blink and have it float up and down at the same time. Make the blinking animation first and then fit the floating around it. Add more frames if you need to so that the floating repeats seamlessly.