Adding a Pattern
Adding patterns to a pixel doll
I’ve had a couple of people ask how I make patterned clothes, or making something multiple colours. This method can be used in any program, but I’ve used Paint in this case.
Create Your Pixel Art
There are several ways to do this, but this is one I commonly use.
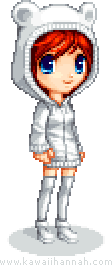
First, you need to decide what kind of pattern you want and draw your doll.
I’ve decided on a long panda hoodie, with striped stockings. So there will be a total of two patterns and the colours will be black and white (or grey, depending on your monitor :P).
I prefer working with any colour other than black, because sometimes it’s hard to see the shades. So I drew the entire outfit in white.
Recolouring
In Photoshop, you can flood fill to change the colours easily, but Paint has a few more steps.
Pick your new colour – in my case, it’s solid black. You’ll need to set it as the background colour, so you might have to draw a pixel with it and then using the eyedropper tool, right click on it.
Next, we can set the foreground colour. Again, using the eyedropper tool, left click to select the colour you want to change (in this case, the darkest grey).
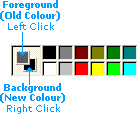
Hopefully you should have something like the this ^_^
Now that we have the right colours, select the eraser tool. Hold down right click and draw over your pixel art with the eraser.
It replaces the dark grey pixels with black, and doesn’t affect any other colours! ^0^
Now to do those same steps for the other shades 😛 After all of that, you should have two dolls, in different colours.
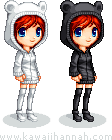
Masking
Before we can put the dolls together, we need erase the pieces we don’t need.
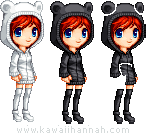
So, duplicate the doll you recoloured (I have one coloured white and two coloured black).
On the second doll, start erasing the pieces you don’t need. I did this using the pencil tool and white as the foreground colour.
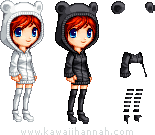
You can see I’ve drawn around the ears, and the top half of the hoodie. I’m going to leave the arms all black.
I’ve finished off erasing the unwanted areas. I’ve also done the stripes now – they are just lines that are 2 pixels thick.
You may want to copy and paste the first doll and your mask, just in case you don’t like how it looks and want to tweak it.

Before moving things around, I set my background colour back to white (eyedropper, right click on something white).
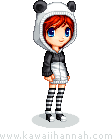
Then I select the selection tool and make sure the background will be transparent (bottom option on the left pane).
Now finally, move your mask over your doll XD Yaaaay, now it looks more like a panda!
Anti-aliasing
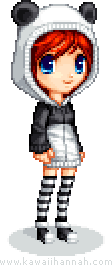
You could leave it at the last step, but I usually like to anti-alias the edges of the colour joins so the edges aren’t so harsh.
Using the darker greys and lighter shades of black, I place pixels around the edges of the patterns.
I also refined the shape around the ears a bit and curved the stripes on the stockings at the edges.
Go Nuts!
So once you’ve got the hang of one colour, you could try more XD It doesn’t apply just to clothes, you could even put patterns on the eyes, skin, hair – anything ^_^
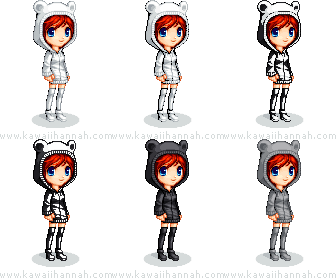
You can also put patterns on top of patterns – like how I placed a star on top of the black part of the top.
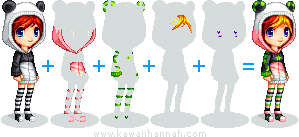
Above are the masks I used to make the doll~ Have fun! ^^
